How to use the family tree
This website is the family tree of the Jaggis of Chakwal, starting from Bakhshi Bhanna Mal Jaggi. Anyone with the link can look at it. Family members who were invited can also add and correct information. Changes are not visible right away: the admin checks each one first, and it appears once approved.
1. Signing in
You only need to sign in to add or change something. There is no password.
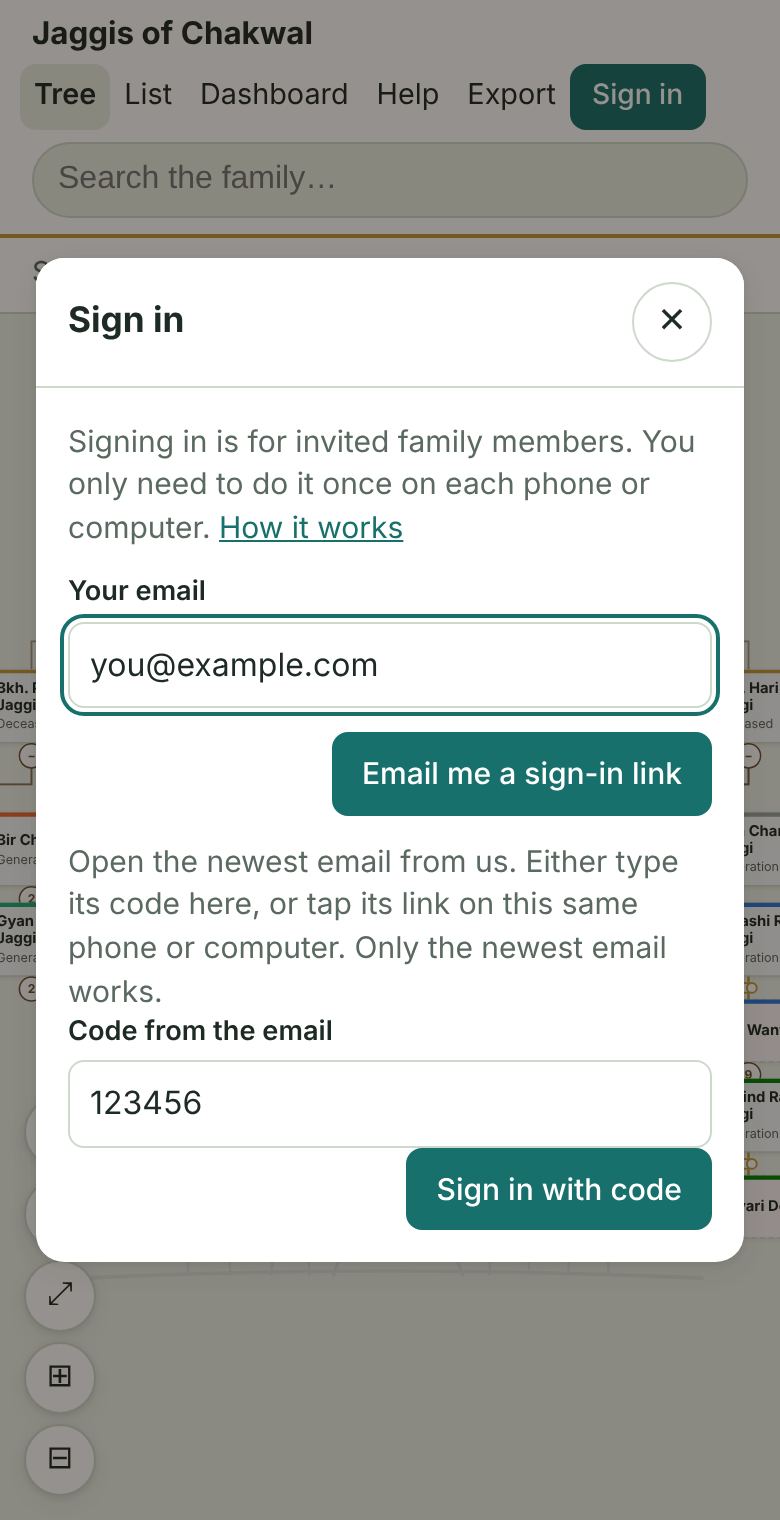
- Open the site and tap Sign in at the top right.
- Type the email address you were invited with, and tap Email me a sign-in link.
- Open the email from Sunil Jaggi. It arrives within a minute. If not, look in your Spam folder.
- Easiest: go back to the site and type the 6-digit code from the email into the box, then tap Sign in with code.
Or tap the link in the email.
2. Claim your box: "This is me" (important)
- Tap Go to my box on the yellow reminder, or type your name in Search the family and pick yourself.
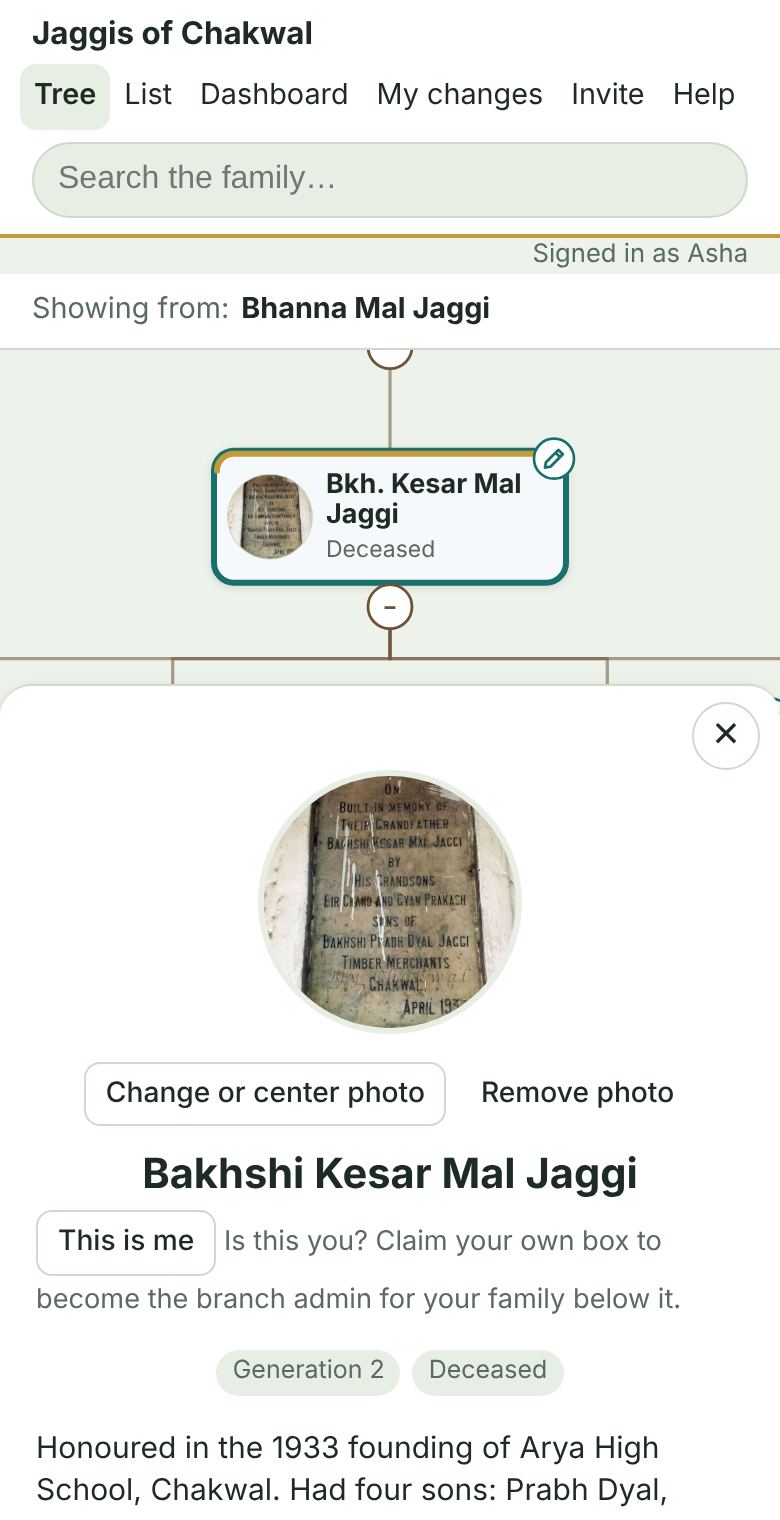
- On your card, tap This is me and confirm.
- Not in the tree yet? Open your father's or mother's card, tap Add: Child, add yourself, and once you appear, claim that box.
Once you are signed in, open your own box in the tree and tap This is me. You become the branch admin for your own family below that box. If your invitation was linked to that box, this happens straight away. Otherwise the person who invited you, or the admin, confirms it first. Each account can claim only one box, and each box belongs to only one person.
As a branch admin:
- You, your husband or wife, your children, grandchildren and their husbands and wives: you can edit them, add children and spouses, and change photos. Your changes appear in the tree straight away, with no waiting.
- Your parents and grandparents who have passed away: you can correct their details and photo. If a brother or cousin has also claimed their own box, changes to those shared ancestors go to the admin instead.
- Suggestions from others: when another family member suggests a change to your part of the tree, it appears under Review for you to approve or decline.
- Still checked by the admin: adding parents, brothers and sisters or cousins, and linking people already in the tree.
- Only the admin can remove: nobody else can remove a person from the tree or undo a parent or marriage link, not even as a suggestion. If something needs removing, ask the admin.
- If you married into the family, you can claim your own box, edit your own details and photo, and look after your children's families. Nobody except the admin can add the parents, brothers or sisters of someone who married in, not even as a suggestion, so the tree stays about this family.
Every change records who made it and when, under Sources on the person's card. The admin can undo any change, and sees every branch admin and their box on the Members page, where they can also remove someone as branch admin.
3. Staying signed in
Once you're signed in, the site remembers you on that phone or computer, in that browser. Next time, just open the site; you don't need to sign in again.
You will be asked to sign in again only if:
- you use a different phone, computer or browser,
- you tapped Sign out,
- you use a private or incognito window, or you cleared your browser's history.
- iPhone: in Safari, tap the Share button, then Add to Home Screen.
- Android: in Chrome, tap the ⋮ menu, then Add to Home screen.
4. Looking around the tree
- Move around: scroll up and down with two fingers on a trackpad, the mouse wheel, or by dragging. Pinch, or use the + and − buttons, to zoom. The bar across the top of the tree shows which generation and family you are looking at; tap a name in it to go there.
- Open a family: the small round button under a person shows how many children they have. Tap it to show or hide them.
- See a person's details: tap their card. Their parents, spouse, children and siblings are listed, and you can tap any of them.
- Quick look: rest the mouse on a box, or press and hold it on a phone, to see a balloon with a larger photo, years and age, birthplace, work, spouse, children, branch, and how the person is related to you. A normal tap still opens their full card.
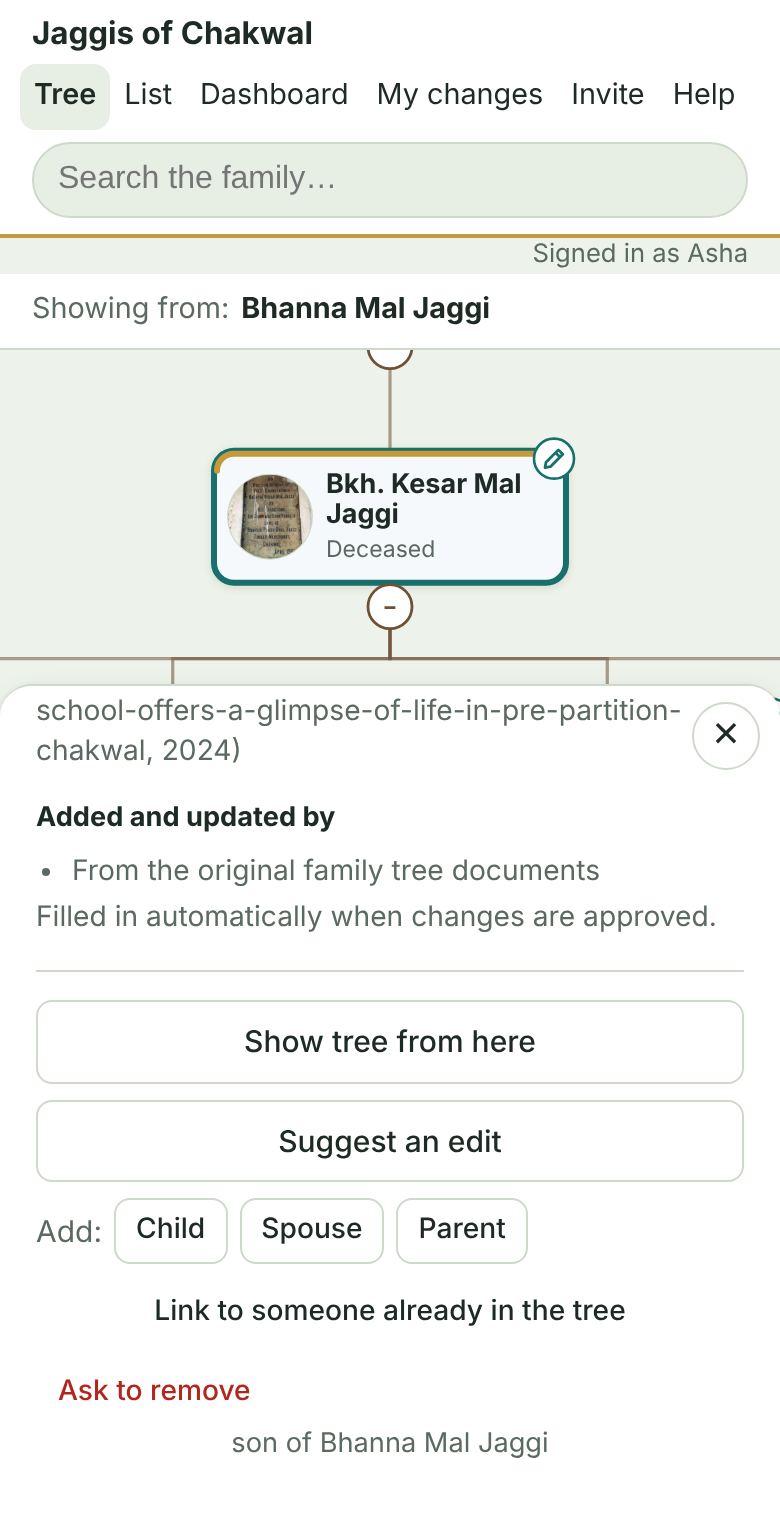
- Edit straight from the tree: when you are signed in, each box has a small pencil in its top corner. Tap it to open that person's edit form. It works the same as Suggest an edit on their card, and changes still wait for the admin's approval.
- Husbands and wives: someone who married into the family has their own smaller box with a dashed edge, just below their partner and joined to them by two gold rings. Their children hang below the couple. Children who have no children showing yet are listed in a column, so the tree stays narrow; tap the number under a box to open that family. Tap the box to see or add their details and photo.
- Find someone: type a name in Search the family. Different spellings, like Parkash and Prakash, still find them.
- Start the tree from one person: open their details and tap Show tree from here. The line at the top shows their ancestors; tap any name there to go back up, or Whole tree.
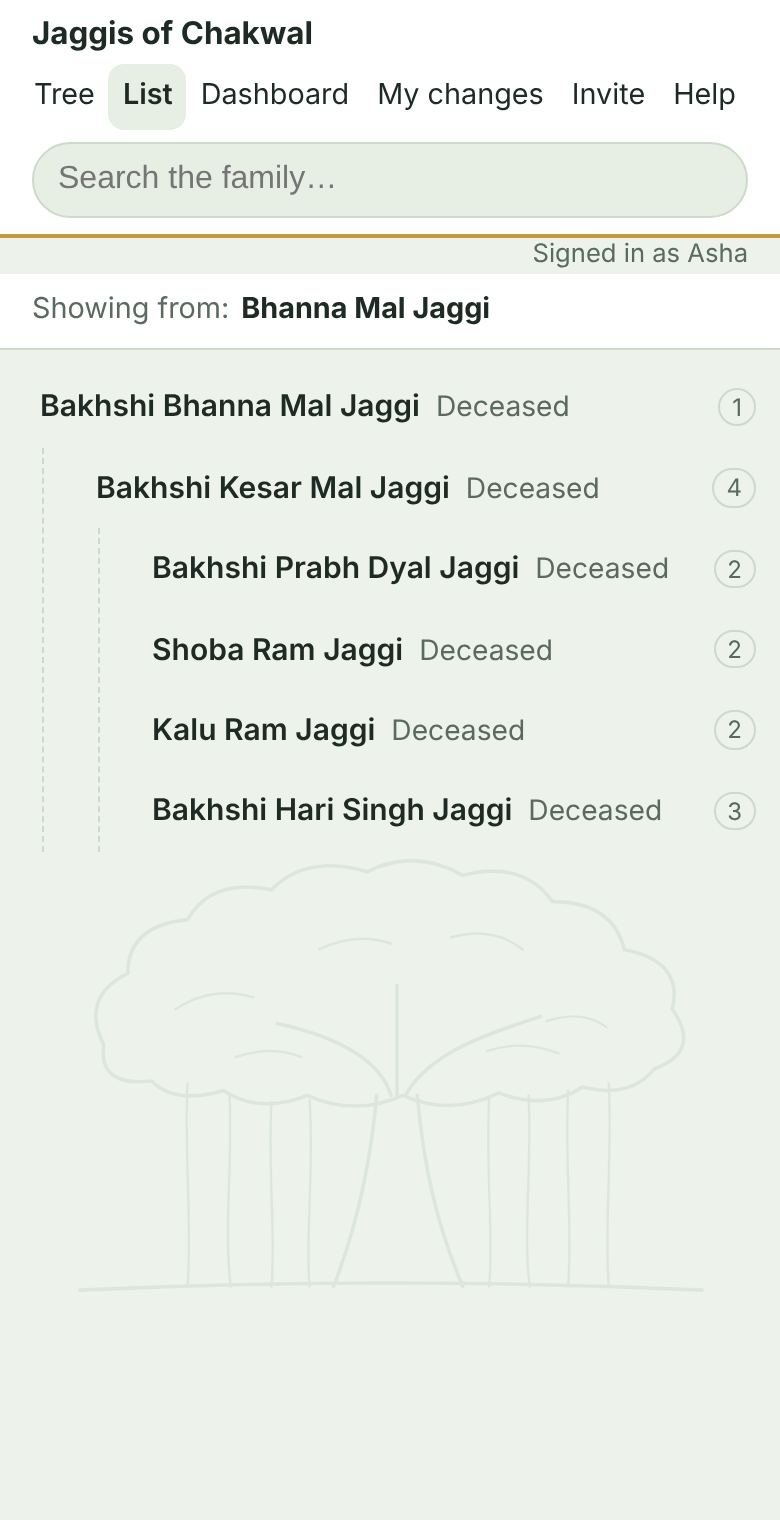
- List view: tap List at the top for a simple indented list, which is easier to read on a small phone.
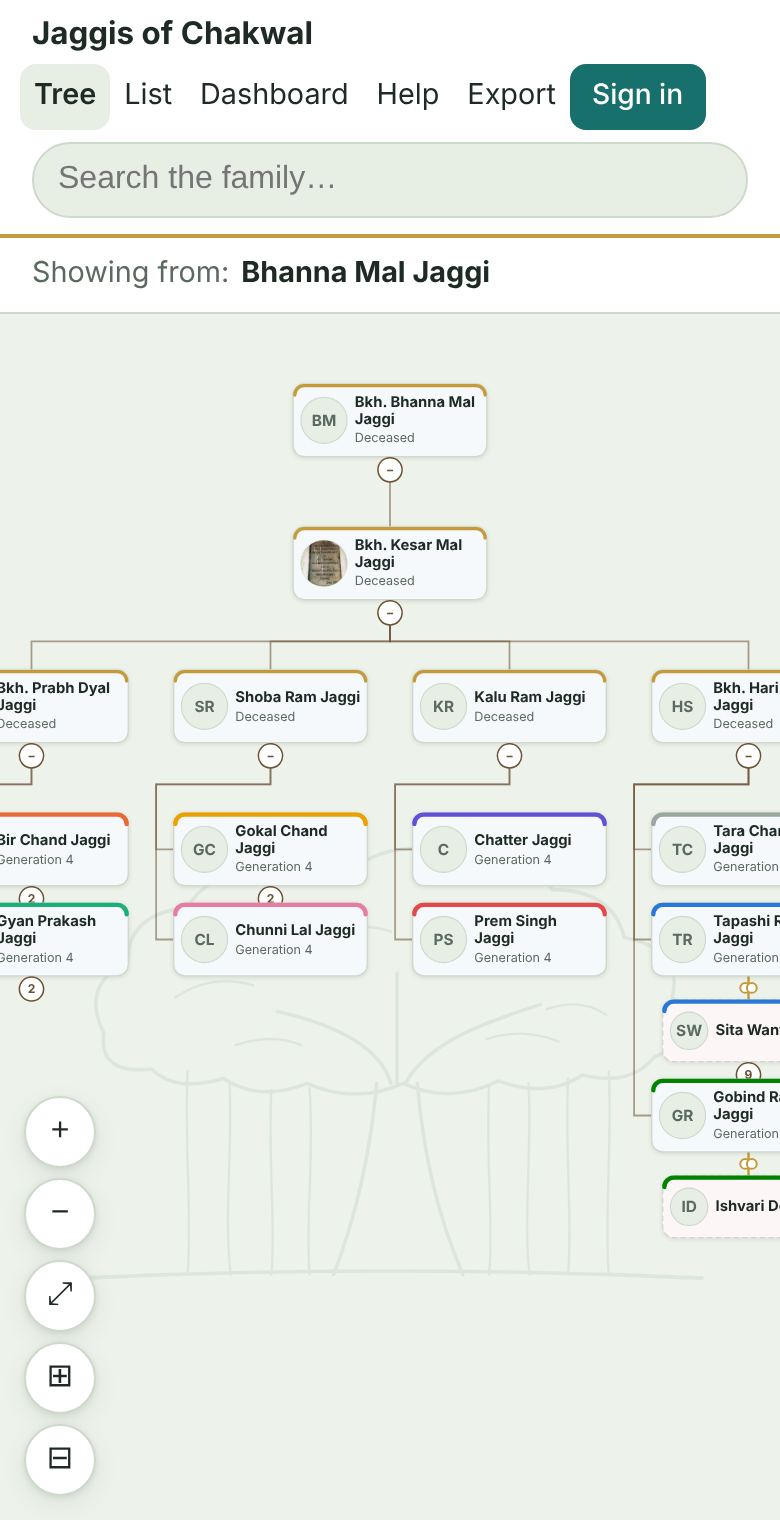
A card marked ?, and a dashed line, means the parent isn't confirmed. If you know the answer, please tell us.
5. Adding or correcting information
Sign in first, then tap the person's card.
- Suggest an edit: correct a name, add the year of birth or death, places, profession or notes.
- Add: Child / Spouse / Parent: add someone who is missing.
- Link to someone already in the tree: connect two people who are both already there.
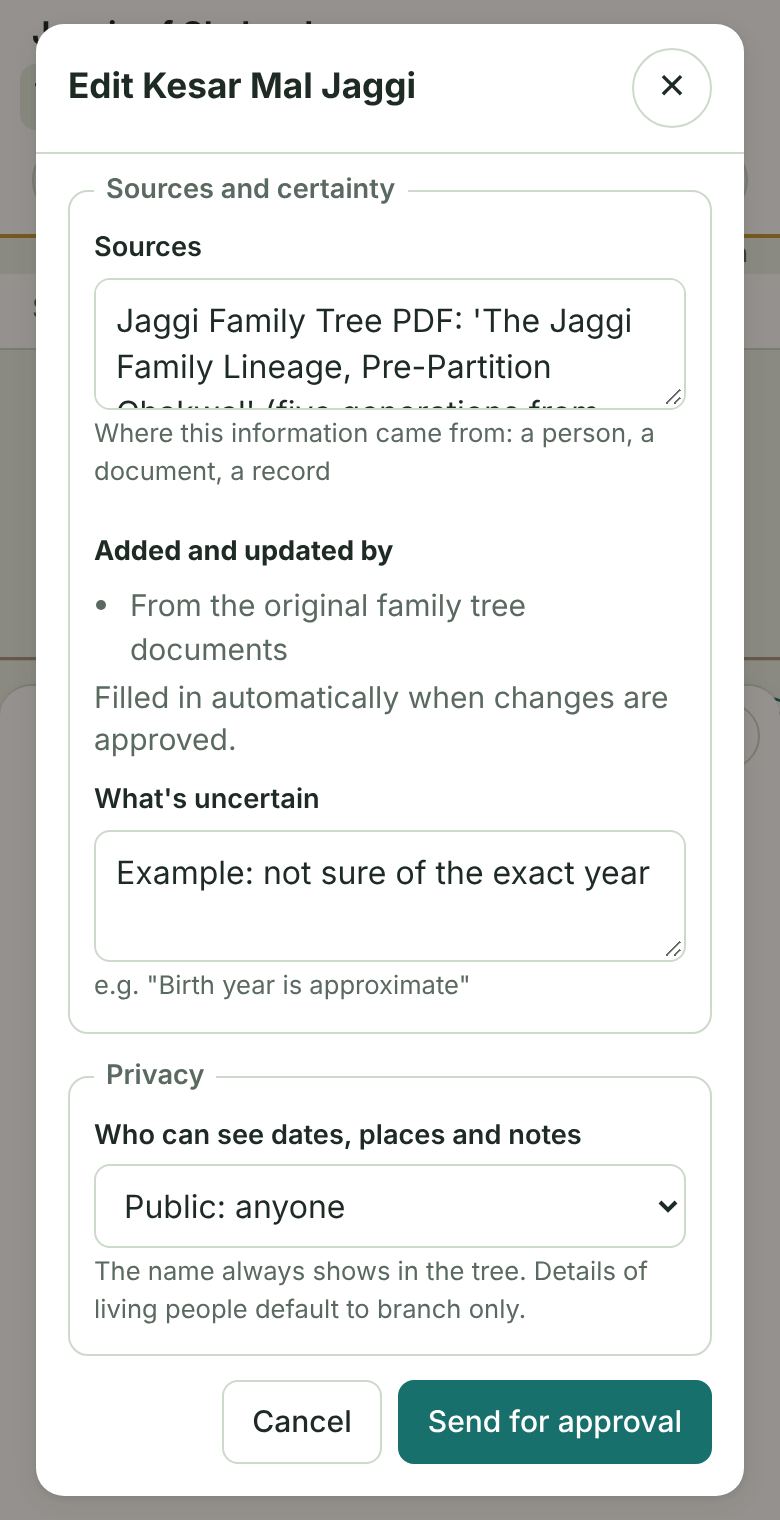
For births and deaths, only the year is recorded, never the full date. Years can be approximate, for example c. 1925 or 1930s. Use Sources to say where the information came from (for example "Dadi's memory" or "school records"), and What's uncertain for anything you're not sure about.
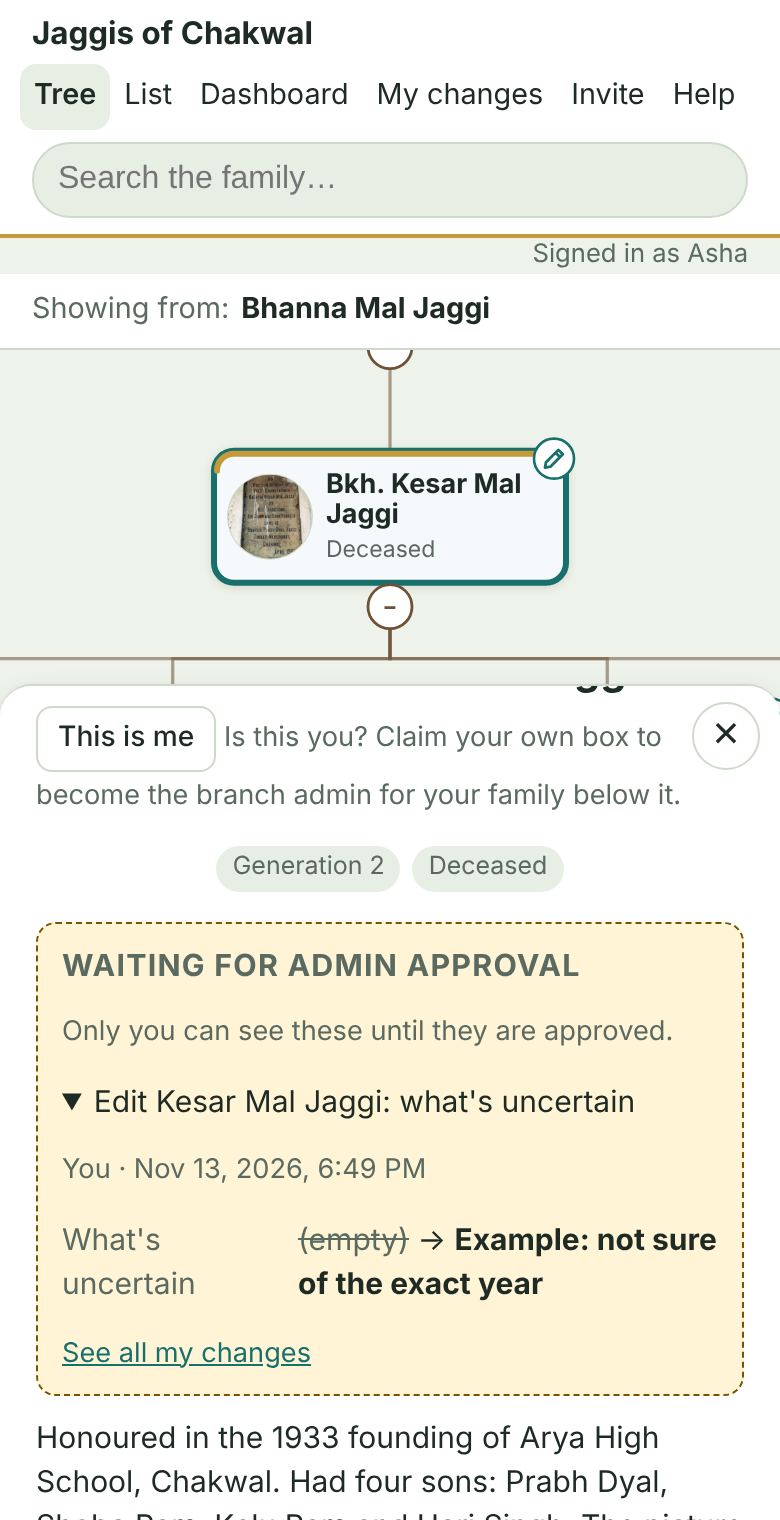
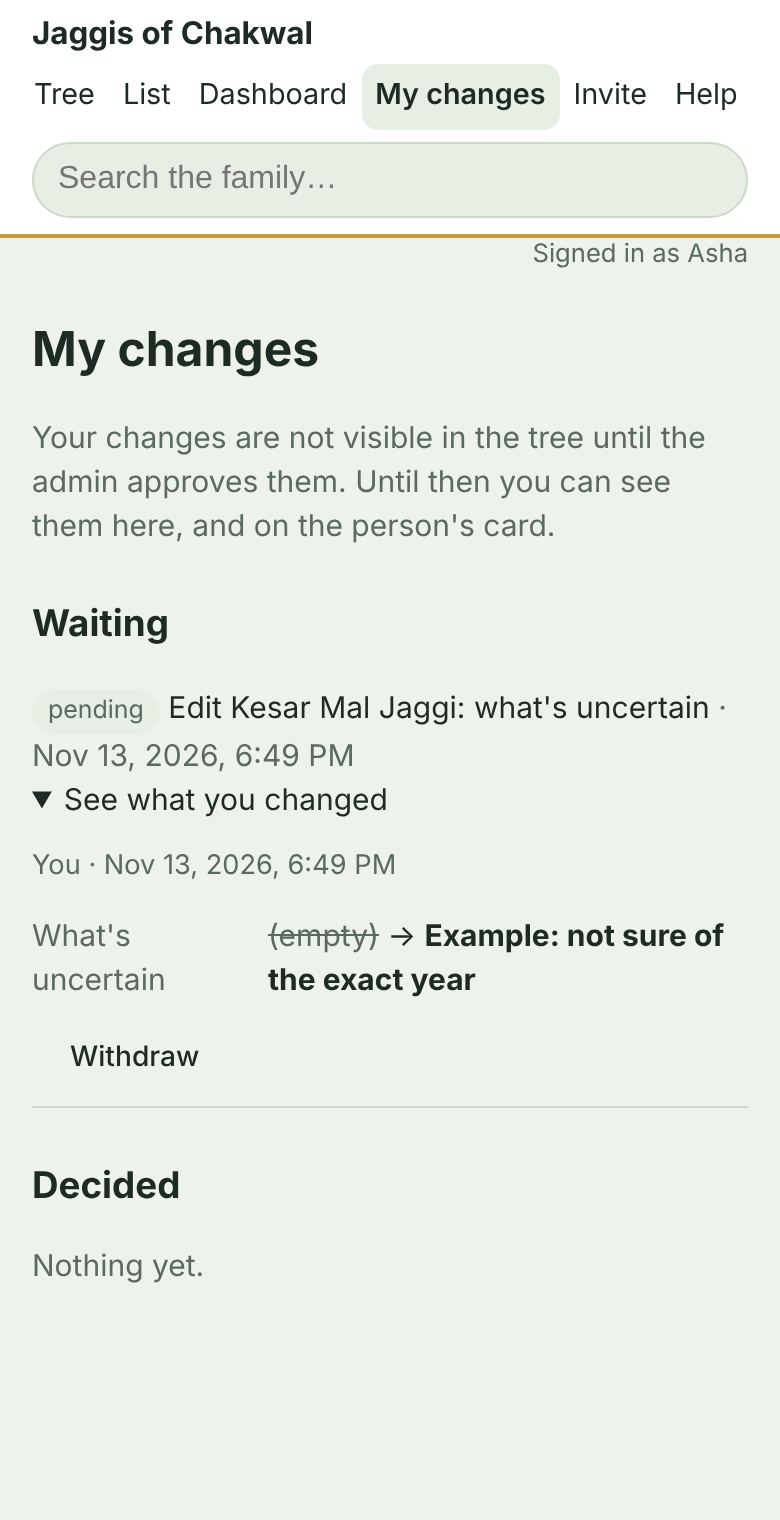
After you tap Send for approval, your change waits for the admin. It won't show in the tree until it is approved. While it waits, you can see it on that person's card in a yellow Waiting for admin approval box (only you see this), and under My changes, where you can also withdraw it. Don't worry about making a mistake; nothing changes until it's approved.
6. Adding a photo
- Sign in and tap the person's card.
- Tap Add photo and choose a picture.
- Center it: drag the photo with your finger or mouse, and use the slider to zoom, so the face sits inside the circle.
- Choose who can see it, then tap Send for approval.
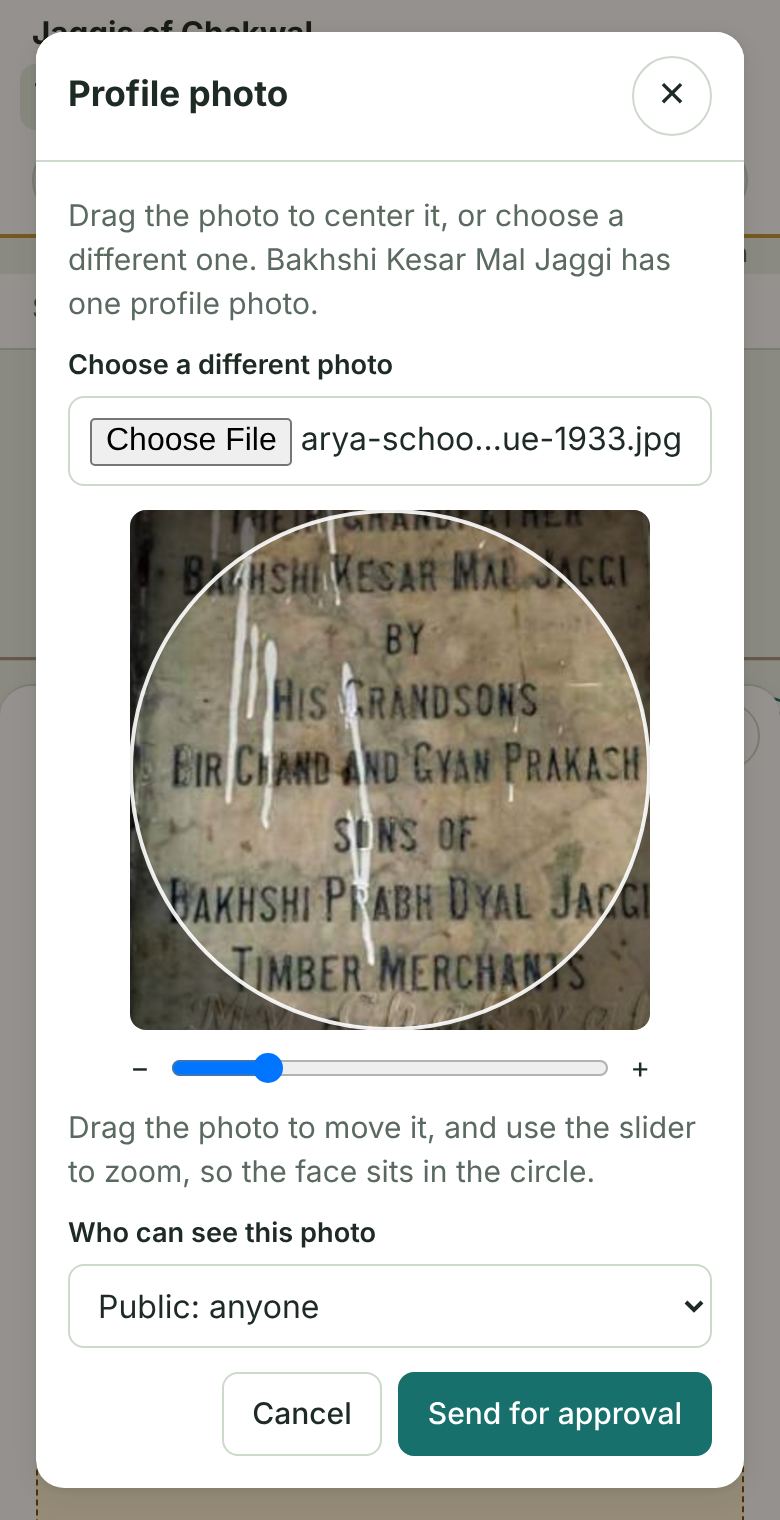
To move a photo that's already there, tap Change or center photo, drag it into place and send it. To take a photo off, tap Remove photo.
Each person has one profile photo. The site makes the picture smaller automatically, so any photo from your phone is fine.
7. Inviting a relative
Anyone who is signed in can invite another family member.
- Tap Invite at the top.
- Type their email and name, and pick who they are in the tree. If they aren't in the tree yet, add them first from a relative's card.
- Tap Invite. The site emails them an invitation with a button that signs them in.
- If you like, also tap WhatsApp or Copy message to send them a ready-made message from your own phone.
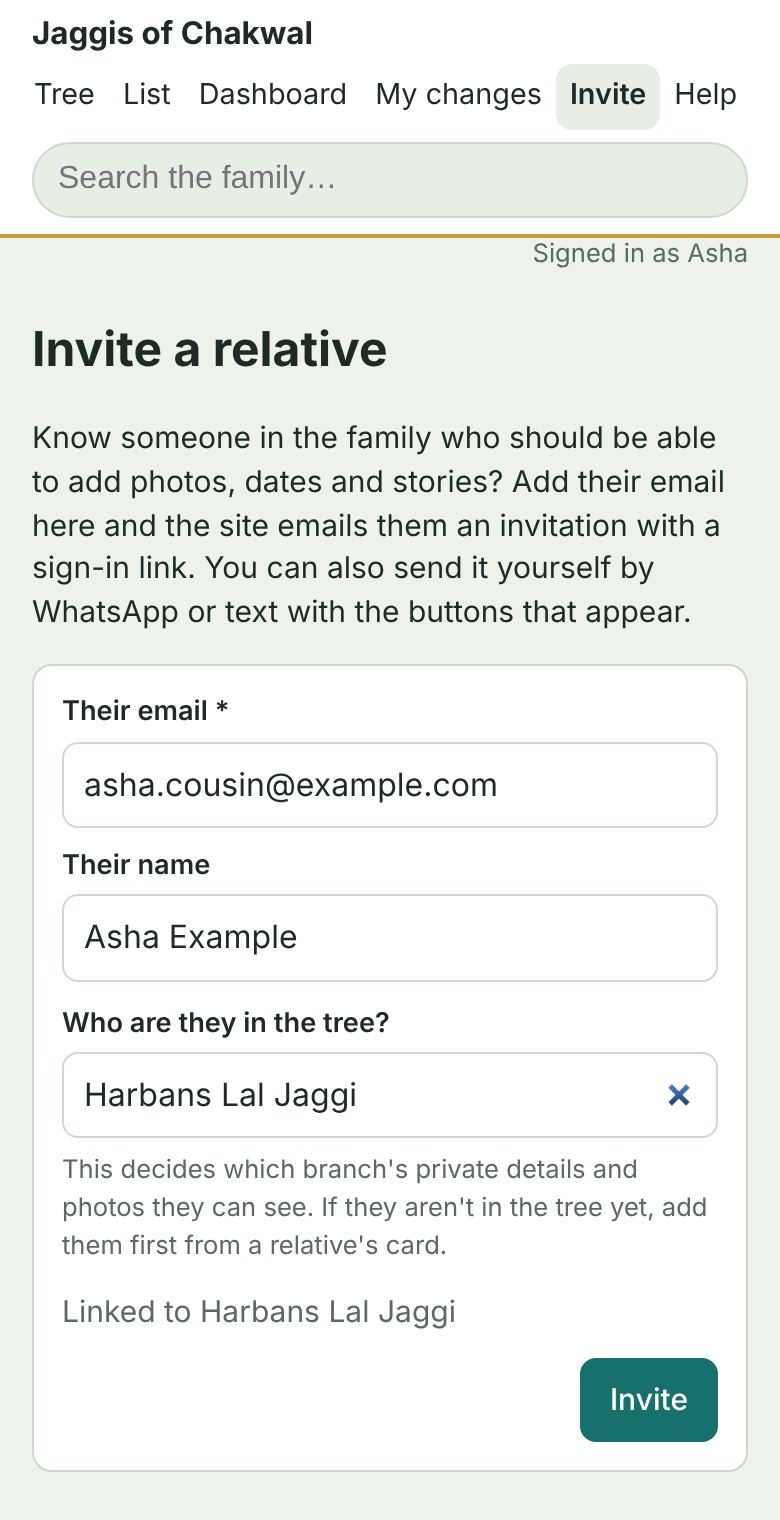
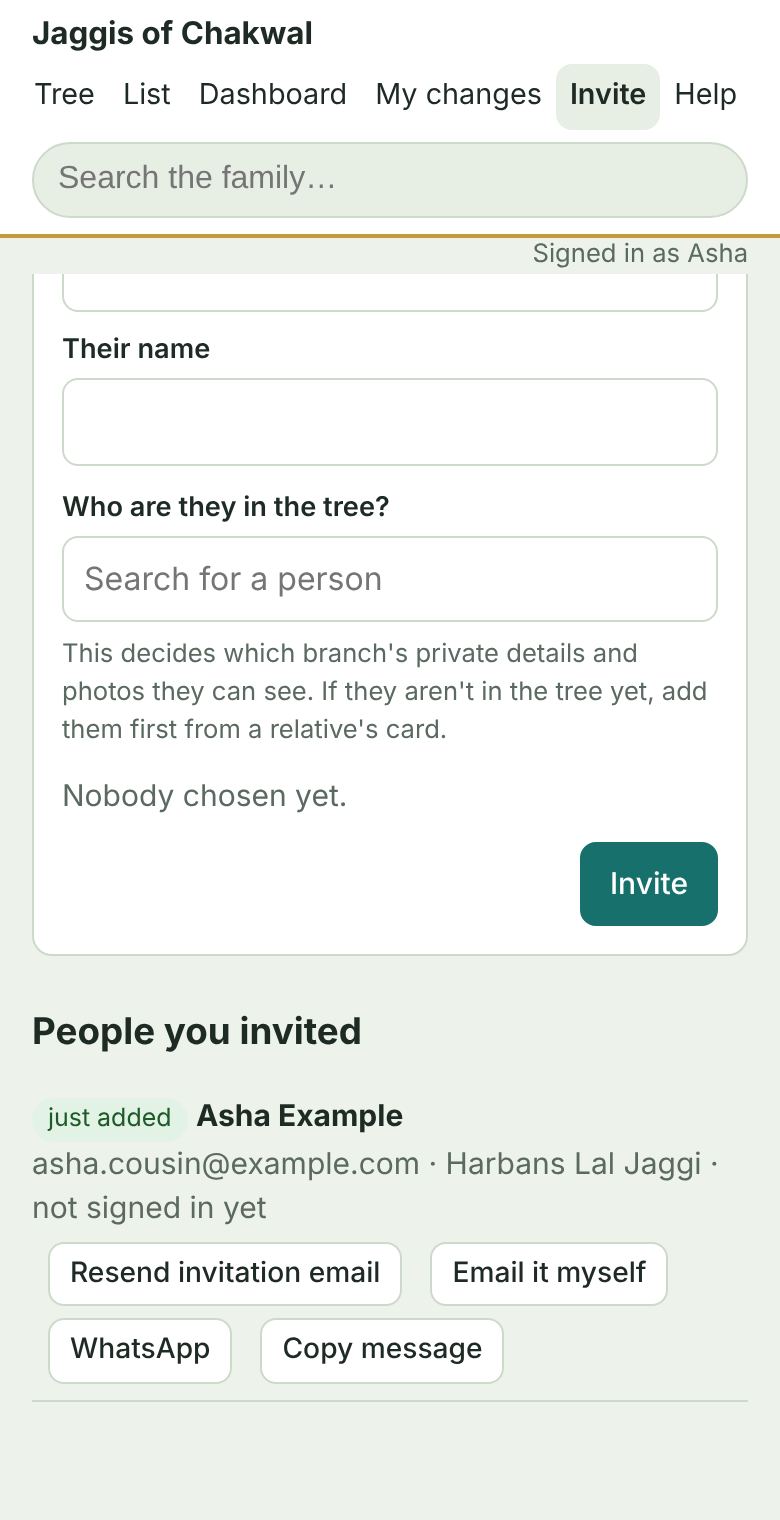
The people you invited are listed on the same page, with Resend invitation email in case it got lost.
8. The family dashboard
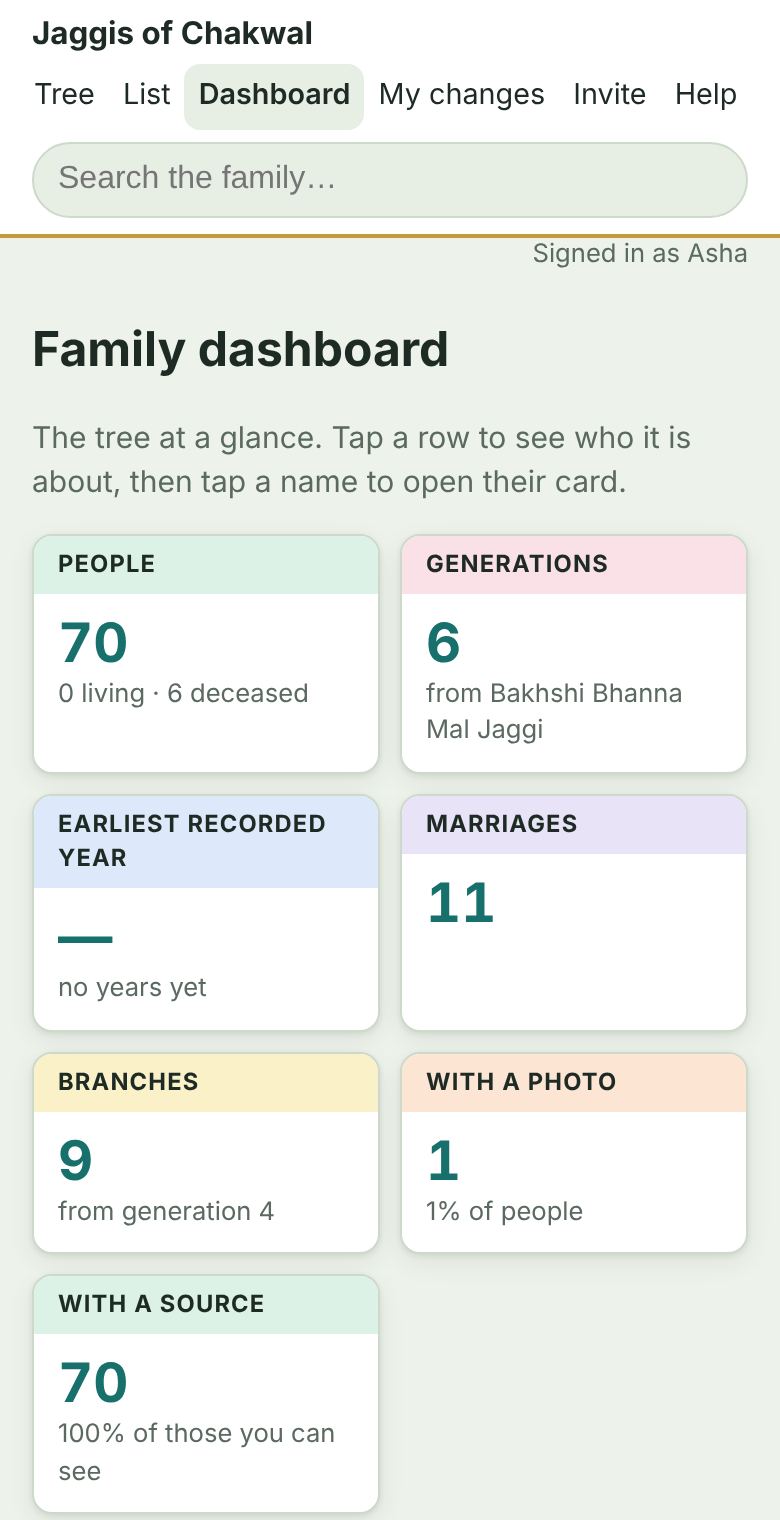
Tap Dashboard at the top to see the whole tree at a glance:
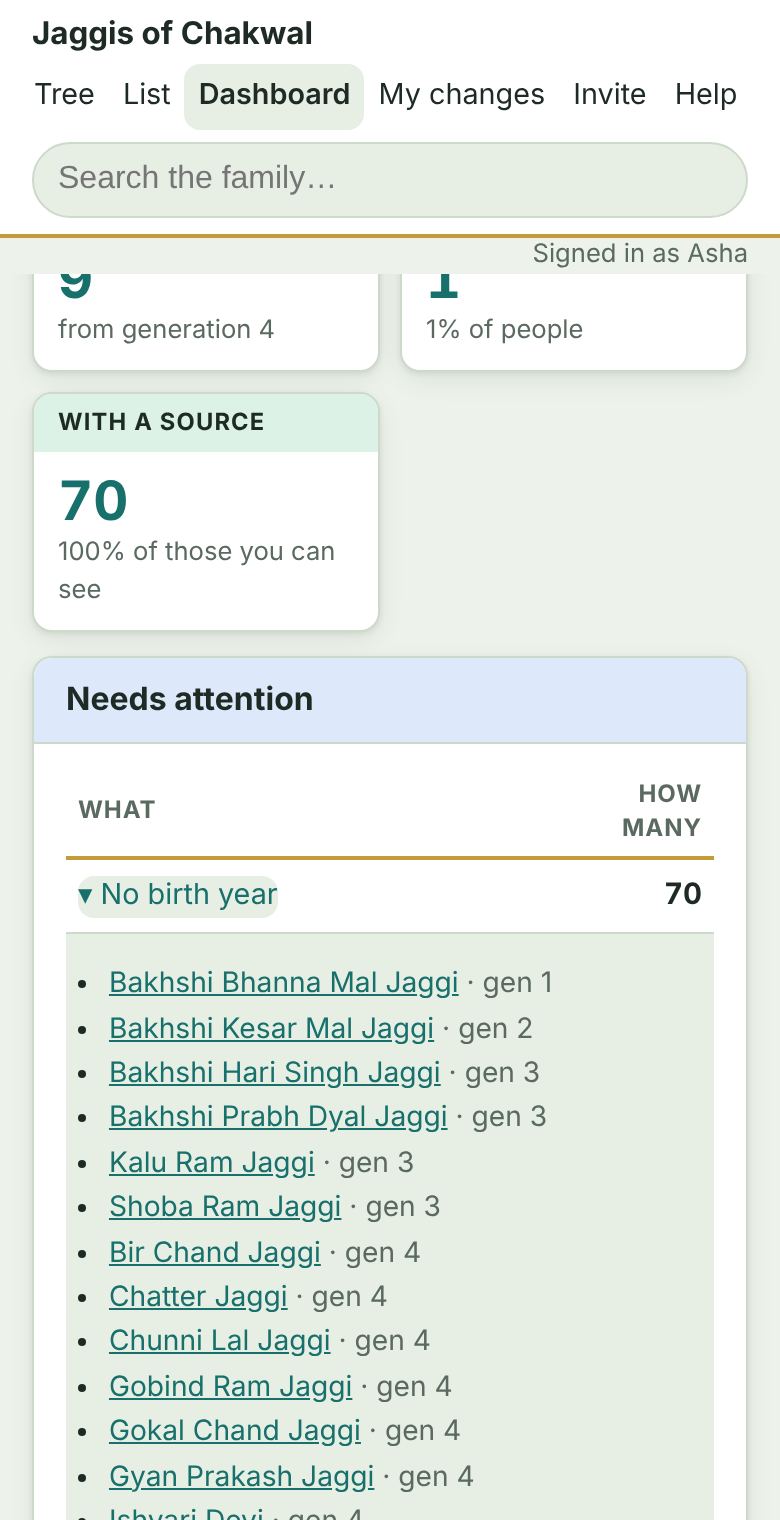
- Numbers: how many people, generations, marriages, branches, photos and sources.
- Needs attention: who is missing a birth year, a birthplace, a parent, a photo or a source. Tap a row to see the names, then tap a name to open their card and fill in what you know.
- People per branch: each branch has its own colour, which is also the coloured top edge of that branch's cards in the tree.
- Born by period, birthplaces, earliest ancestors and common first names.
- Open questions: things the family is still trying to find out. Anyone signed in can add one.
Printing the tree or saving it as a PDF
Tap Export at the top, then Make the PDF. You get a family book: a cover page, the whole tree as an indented chart, and a page for everyone with their years, places and photo. When the print window opens, choose Save as PDF as the printer. On an iPhone, tap Share, then Print, pinch outwards on the preview, then Share and Save to Files.
The .ged file on the same page is for genealogy programs and sites such as Ancestry, FamilySearch or MyHeritage. It is not meant to be opened on its own. Both include only what you are allowed to see.
9. Who can see what
- Names and who is related to whom can be seen by anyone with the link.
- Birth years, places, notes and photos can be marked Public (anyone) or Branch only (only signed-in family in that branch). Details of living people are Branch only unless you choose otherwise.
- Your branch is set when you are invited, by who you are in the tree. It covers your own line and your spouse's line.
- Visits: when you are signed in, the site notes which pages and people you open, so the admin can see how the tree is being used. Only the admin sees this. Visitors who are not signed in are only counted anonymously (no cookies, no names).
- Search engines such as Google can find a simple page for each family member who has passed away, with their Public details only (see the list of ancestors). Living people, and anyone not yet marked as passed away, never get a page and are not named there.
10. If something isn't working
- "This email hasn't been invited yet": ask the admin, or the relative who invited you, to invite that exact email address.
- No email arrived: check Spam, wait a minute, and make sure the address is spelled correctly.
- "Link has expired or was already used": ask for a new email and use the code from the newest one.
- Signed in but can't see someone's dates: those details are marked Branch only for another branch of the family.
For anything else, contact the admin (Sunil Jaggi).
Back to the family tree